Debugging your iOS App's HTTP(S) Traffic
15 Apr 2015When debugging, it’s important to know the exact state of your app in order to make sure it’s acting you want it to. If you’re writing an app that makes API requests, then you will most likely want to be able to see what data is coming to and from your app. Let’s take a look at how we can monitor HTTP and encrypted HTTPS traffic using Burp Suite.
Introduction
In order to listen to the traffic to and from our device, we will be routing the traffic through a proxy server on our computer with BurpSuite. We will go through setting up the proxy server, telling our iOS device to run through the proxy server, how to install BurpSuite’s CA certificate to allow us to decrypt HTTPS traffic, and finally we’ll see how we can monitor our traffic requests.
Setting Up the Proxy Server
After downloading and opening BurpSuite, you will be presented with a view with a lot of tabs, and a lot of options. Don’t worry, we will be spending almost all of our time in the Proxy tab.
The first thing you will want to do is tell Burp to remember your settings. In the menu Burp > Remember Settings > All Options. This way, you won’t have to repeat the setup everytime you open up Burp.
Now go to the Proxy tab, and the Options subtab. This screen is the setup for the actual proxy listener. There are a lot of options that you can set, but we just want to be able to monitor our traffic, so we can leave most of them as the default.
Select the first option in the Proxy Listeners section and click Edit.
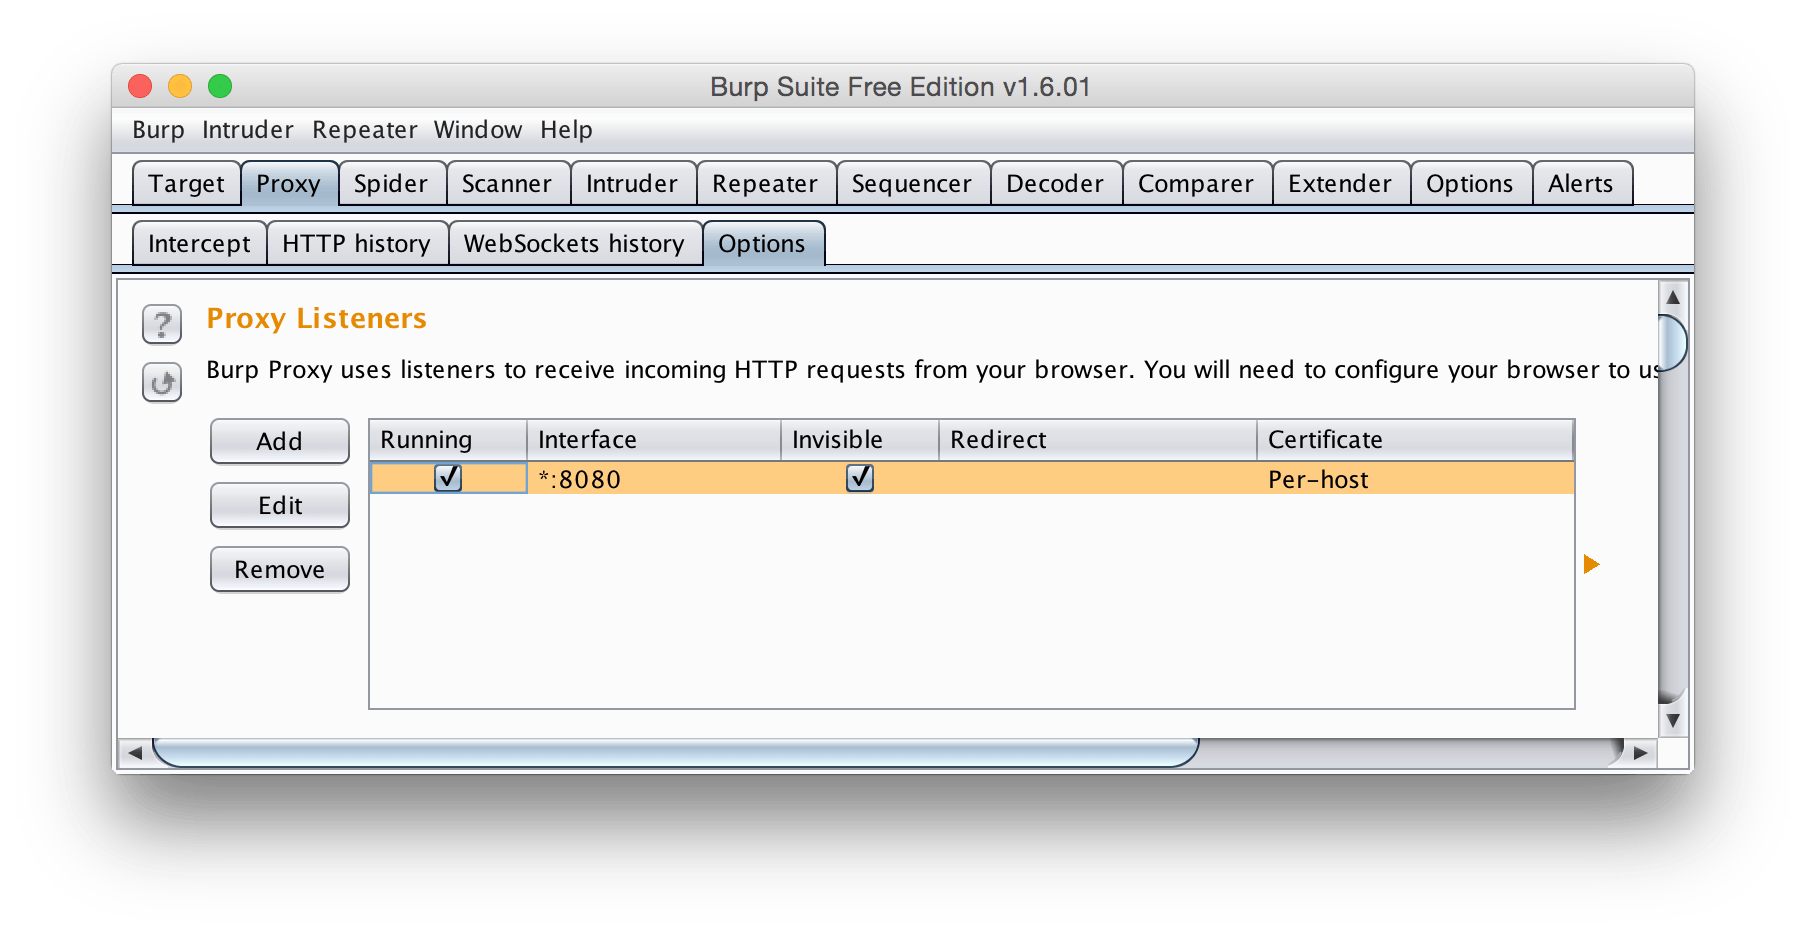
This will open up the options for this specific listener.

We want to change the options to be:
- Bind to port:
8080(or any port you have available) - Bind to address: All Interfaces
This will make it so BurpSuite will monitor all traffic that goes through our computer on port 8080.
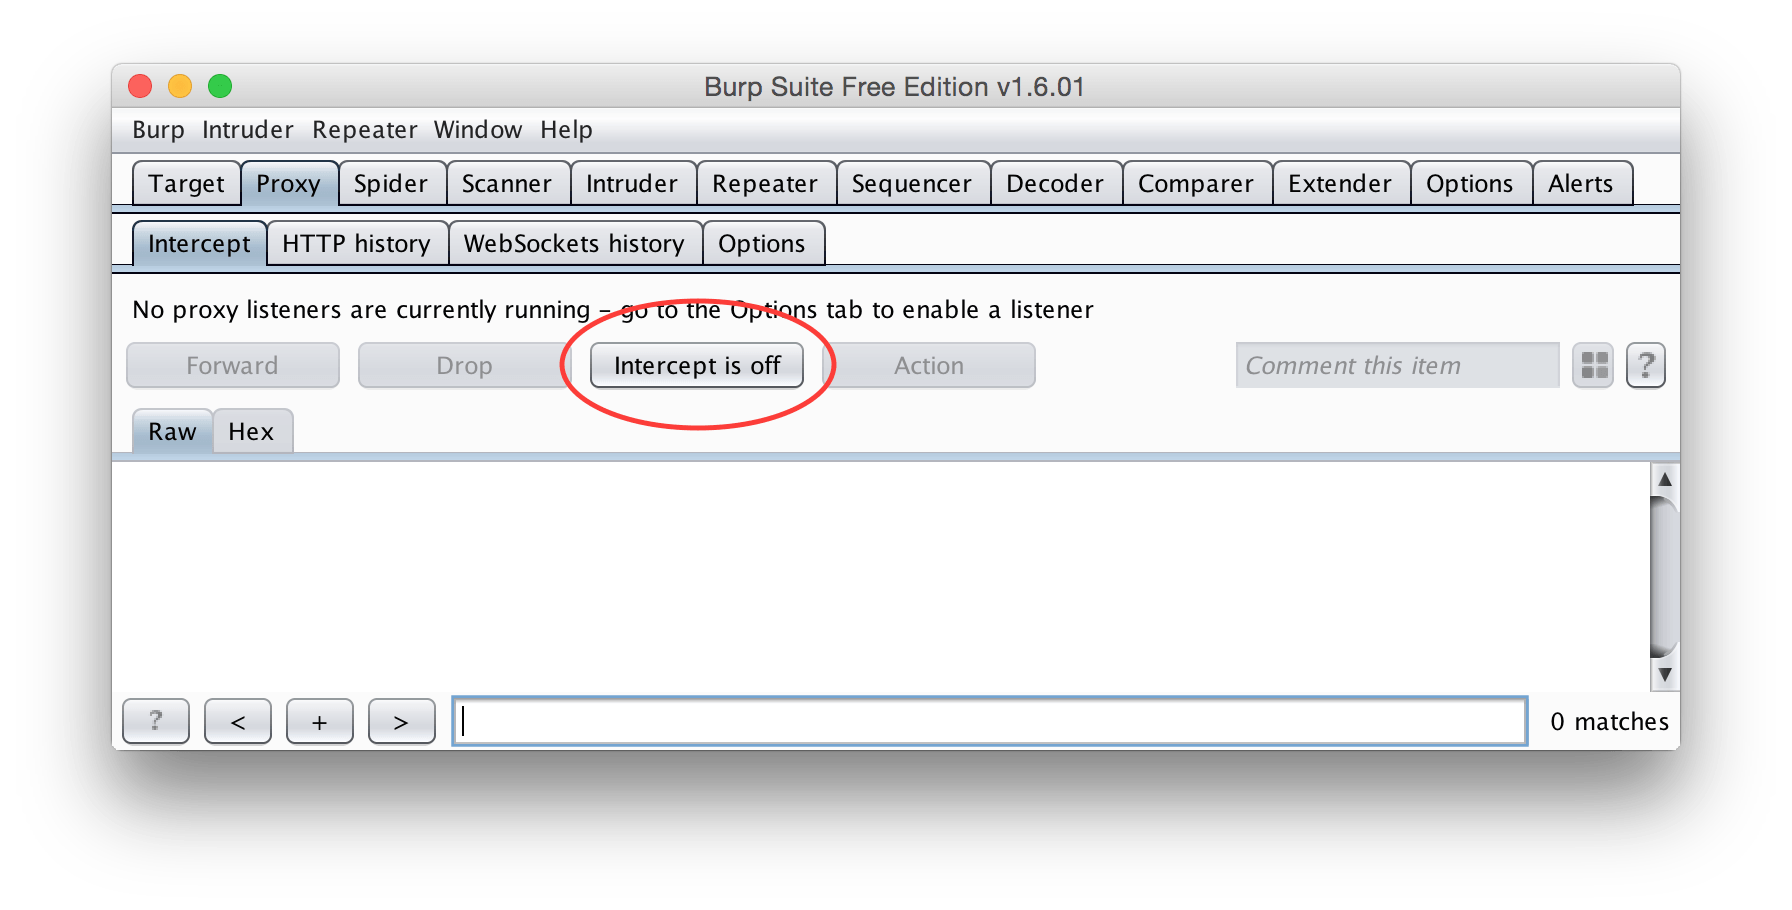
The last option to set is back in the Intercept subtab – Make sure interception is currently turned off.
Send iOS Traffic Through Proxy
The process is slightly different for an iOS Device and the Simulator. In particular, the Simulator has some weird ticks that you have to be careful about.
iOS Device
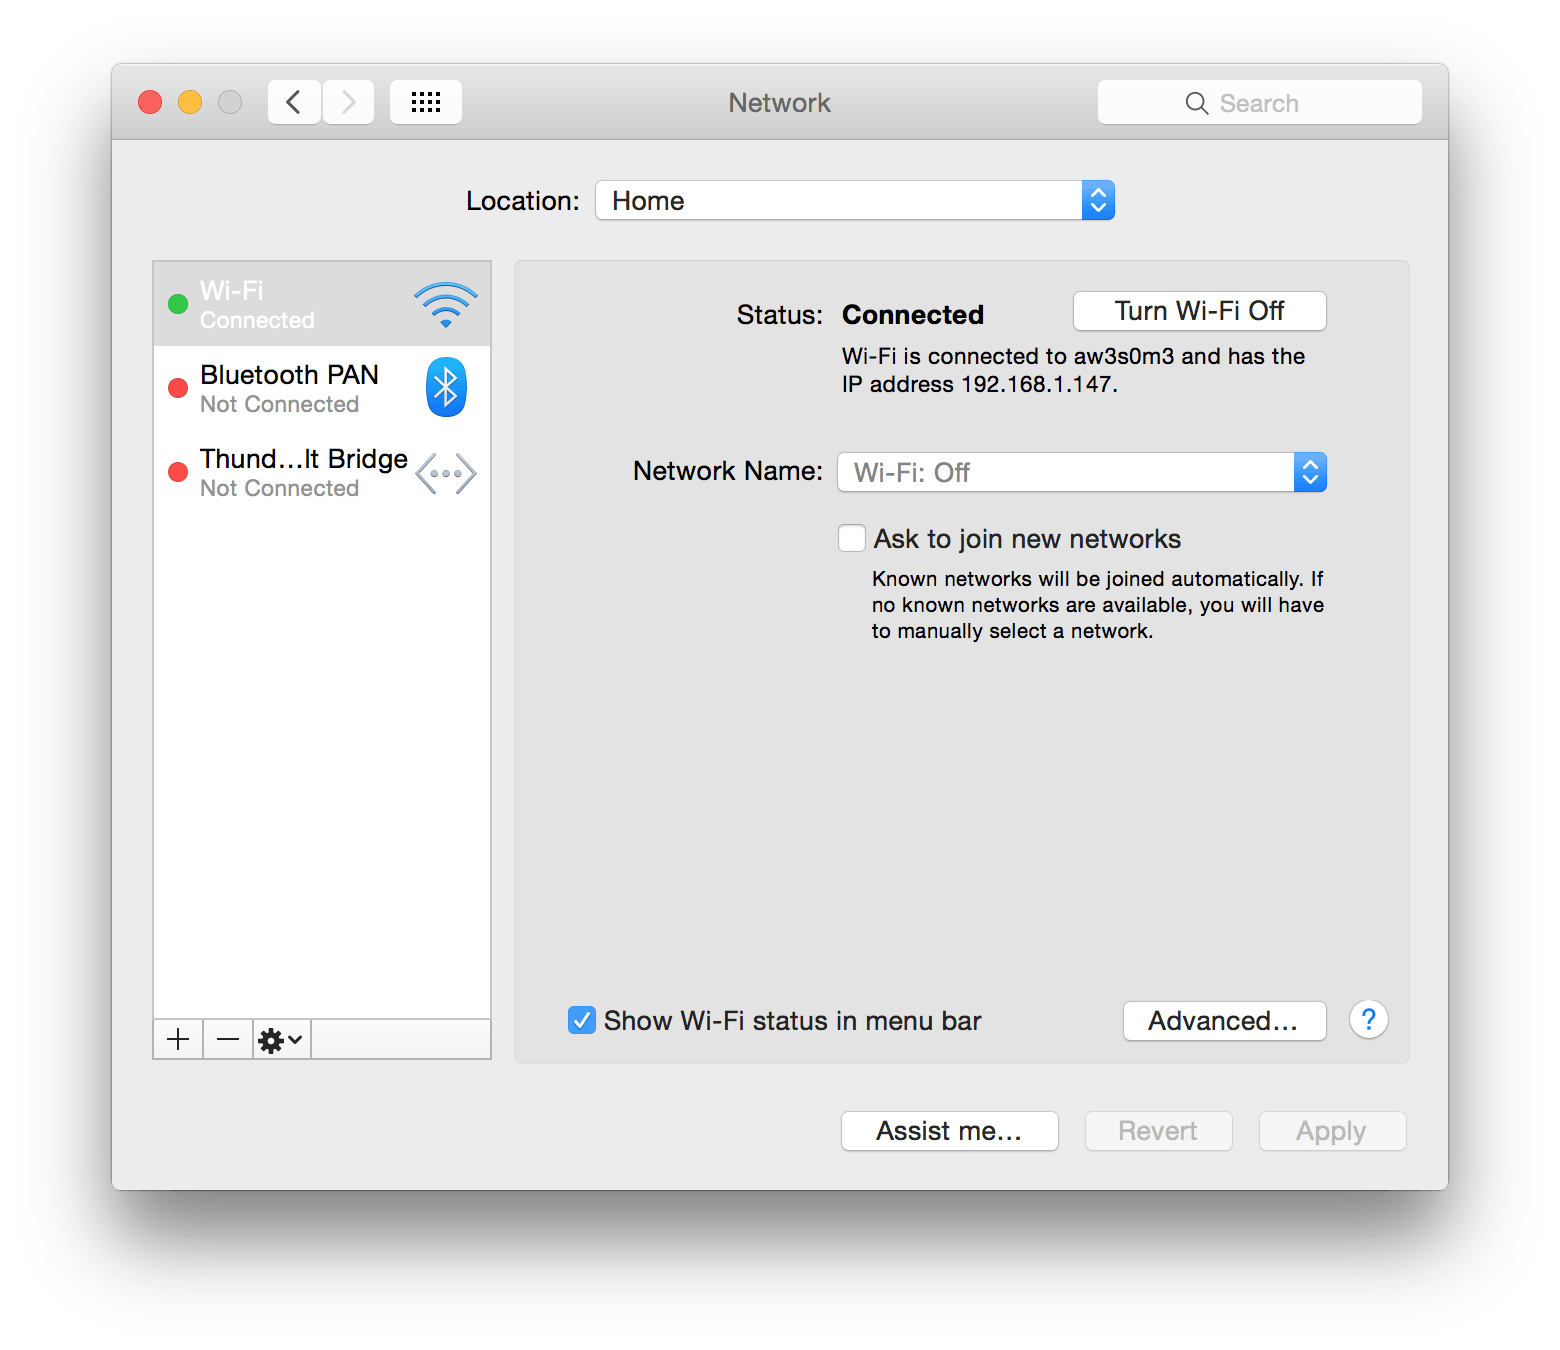
To send our device’s traffic, we need to make sure that we are connected to the same Wi-Fi network. Make a note of your computer’s IP address, which can be found in the System Preferences Network settings.

Now open up the Settings app on your iOS device. Go to your Wi-Fi settings, and go into the advanced settings for your network, by clicking blue button with the i in the middle.
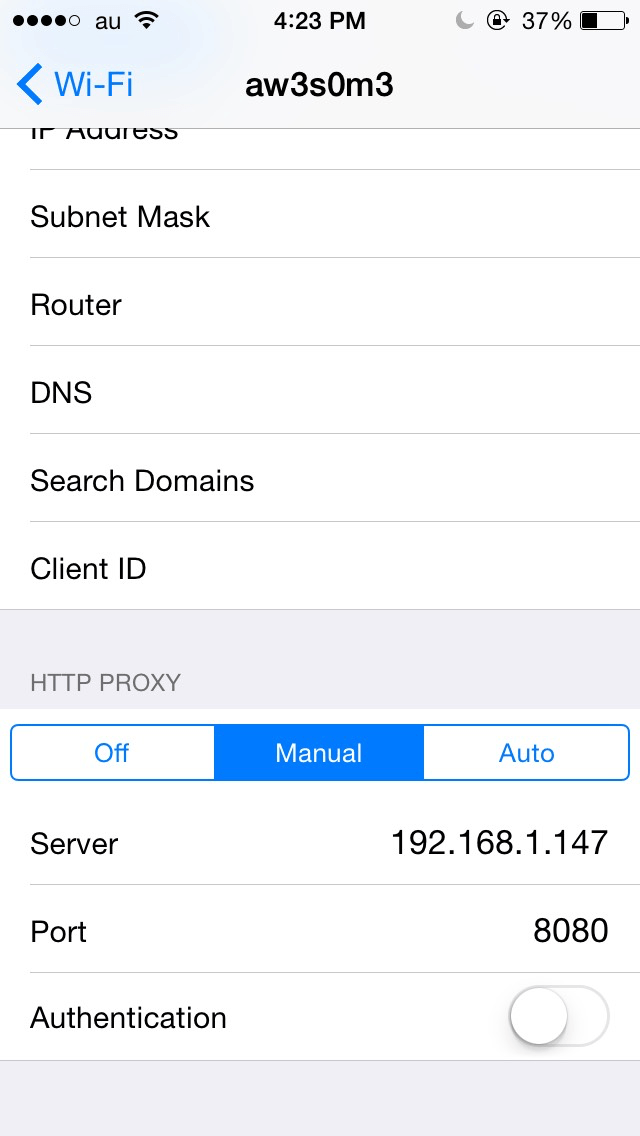
At the bottom there is an HTTP PROXY section. Switch that to Manual. Then input the settings:
- Server:
<IP Address of your Computer> - Port:
<Port that your BurpSuite proxy is running on>
Return back to the main Settings page, and your proxy settings should be saved. All of your HTTP traffic should now be going through your BurpSuite proxy!
iOS Simulator
The iOS Simulator uses the network settings set up in the System Preferences app.
We need to redirect all of our HTTP(S) traffic to go through the proxy. This can lead to headaches, as BurpSuite will be grabbing all the traffic going through. Luckily, the iOS Simulator only uses the network settings at the time it was launched.
So our plan of action is:
- Quit the iOS Simulator
- Redirect our settings to go through the proxy
- Open the iOS Simulator
- Reset our settings to not go through the proxy.
Doing this, we can ensure that we only get the iOS Simulator traffic in our logs.
First off, quit the iOS Simulator.
Open up the System Preferences app, and go into the Network Settings.
Select the connection that you are actually connected to, and go to the Advanced settings.
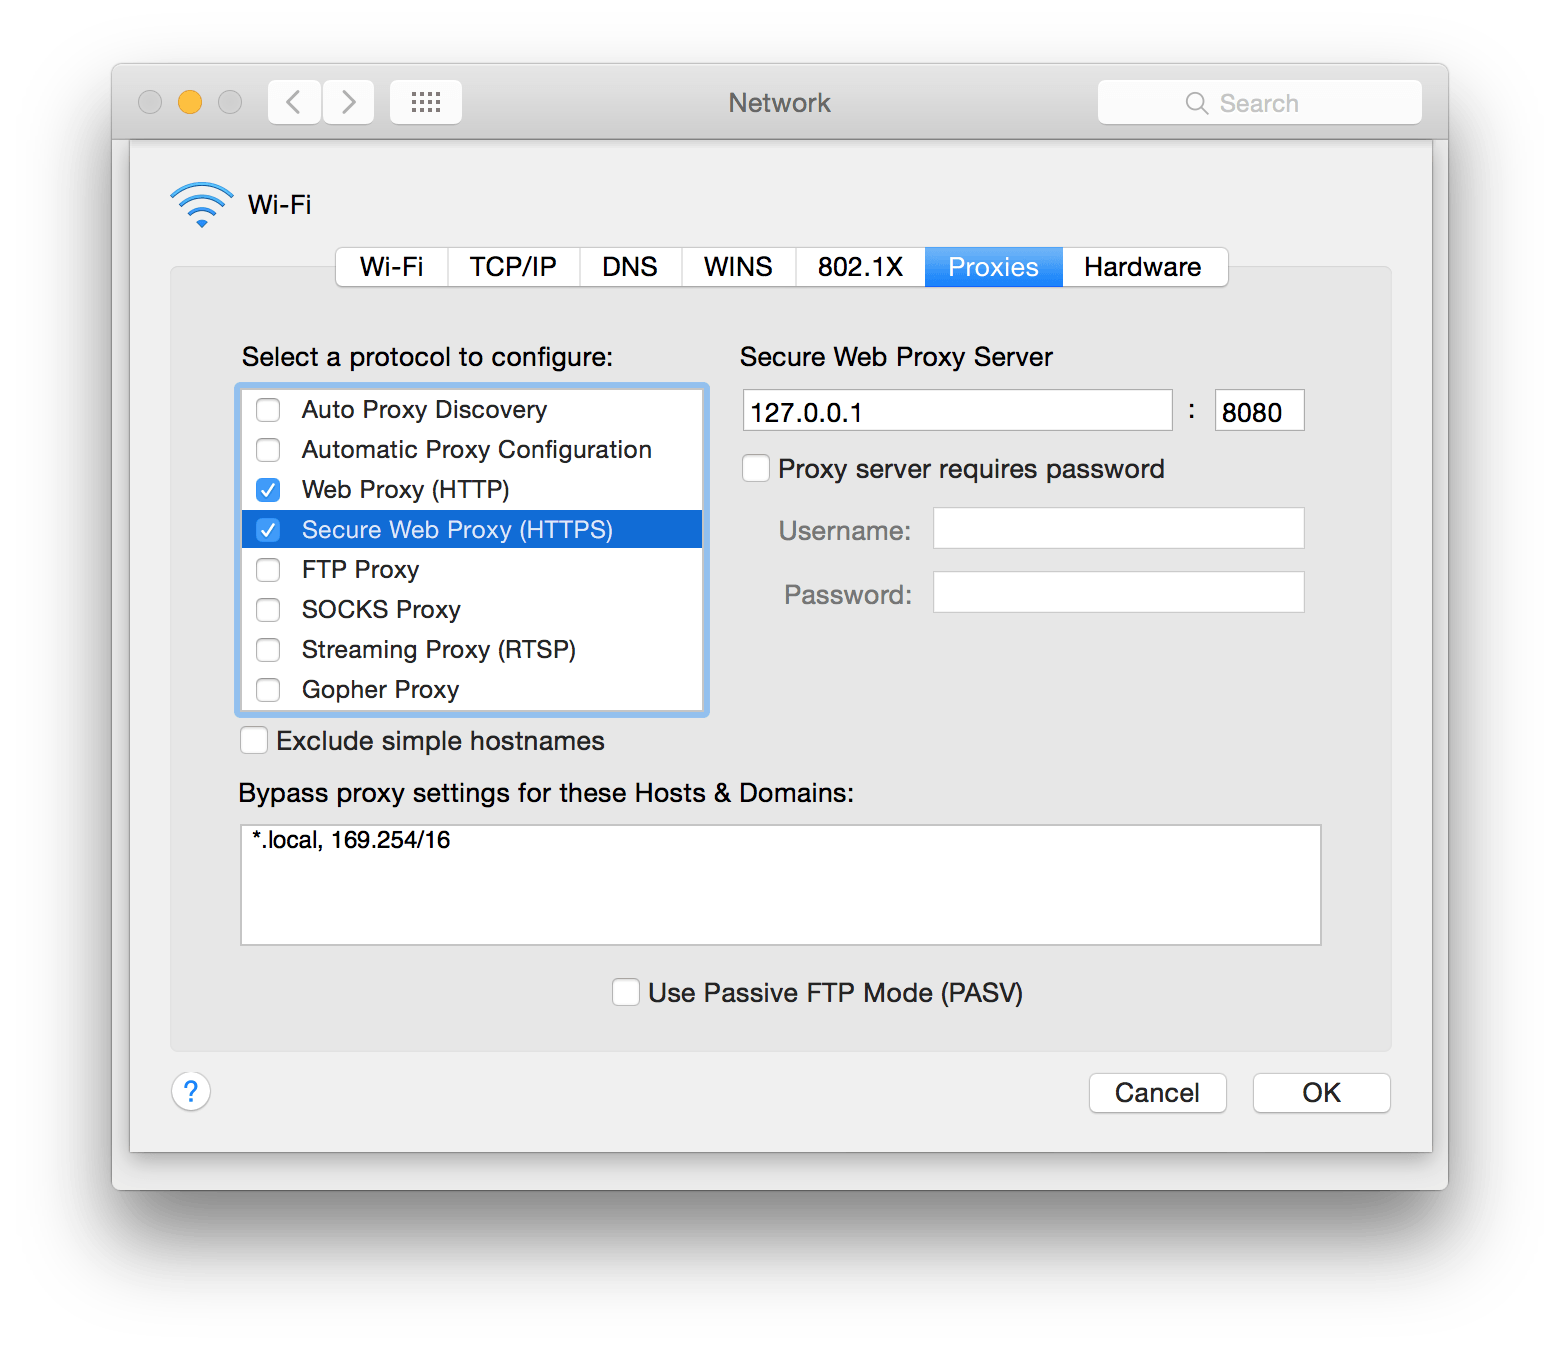
Enable Web Proxy (HTTP) and Secure Web Proxy (HTTPS). Then, in both of those options, make the Web Proxy Server point to 127.0.0.1 and the port to 8080 (or whatever port you set BurpSuite to listen to).
Close out of the Advanced Settings, and save the changes. Now the traffic on your computer is going through BurpSuite.
Open up the iOS Simulator. Now its traffic should be being directed through BurpSuite’s proxy. Currently HTTPS traffic will fail because of certificate problems. We will solve this in the next step (or you could just disable the HTTPS proxy settings if it is irrelevant to you).
Open up the System Preferences, and disable the Web Proxy (HTTP) and Secure Web Proxy (HTTPS) settings that we previously checked, and save the changes. We don’t want all of our traffic going through BurpSuite, just those from the iOS Simulator.
Enabling HTTPS Traffic Decryption
To enable HTTPS decryption, we need to install some certificates on our iOS device. We will essentially be performing a MITM attack on ourselves. Because of this, if you don’t delete the certificate afterwards, you could be left vulnerable to attacks by others. But you’re a smart person, right? You wouldn’t let something like that happen.
Installing the CA Certificate
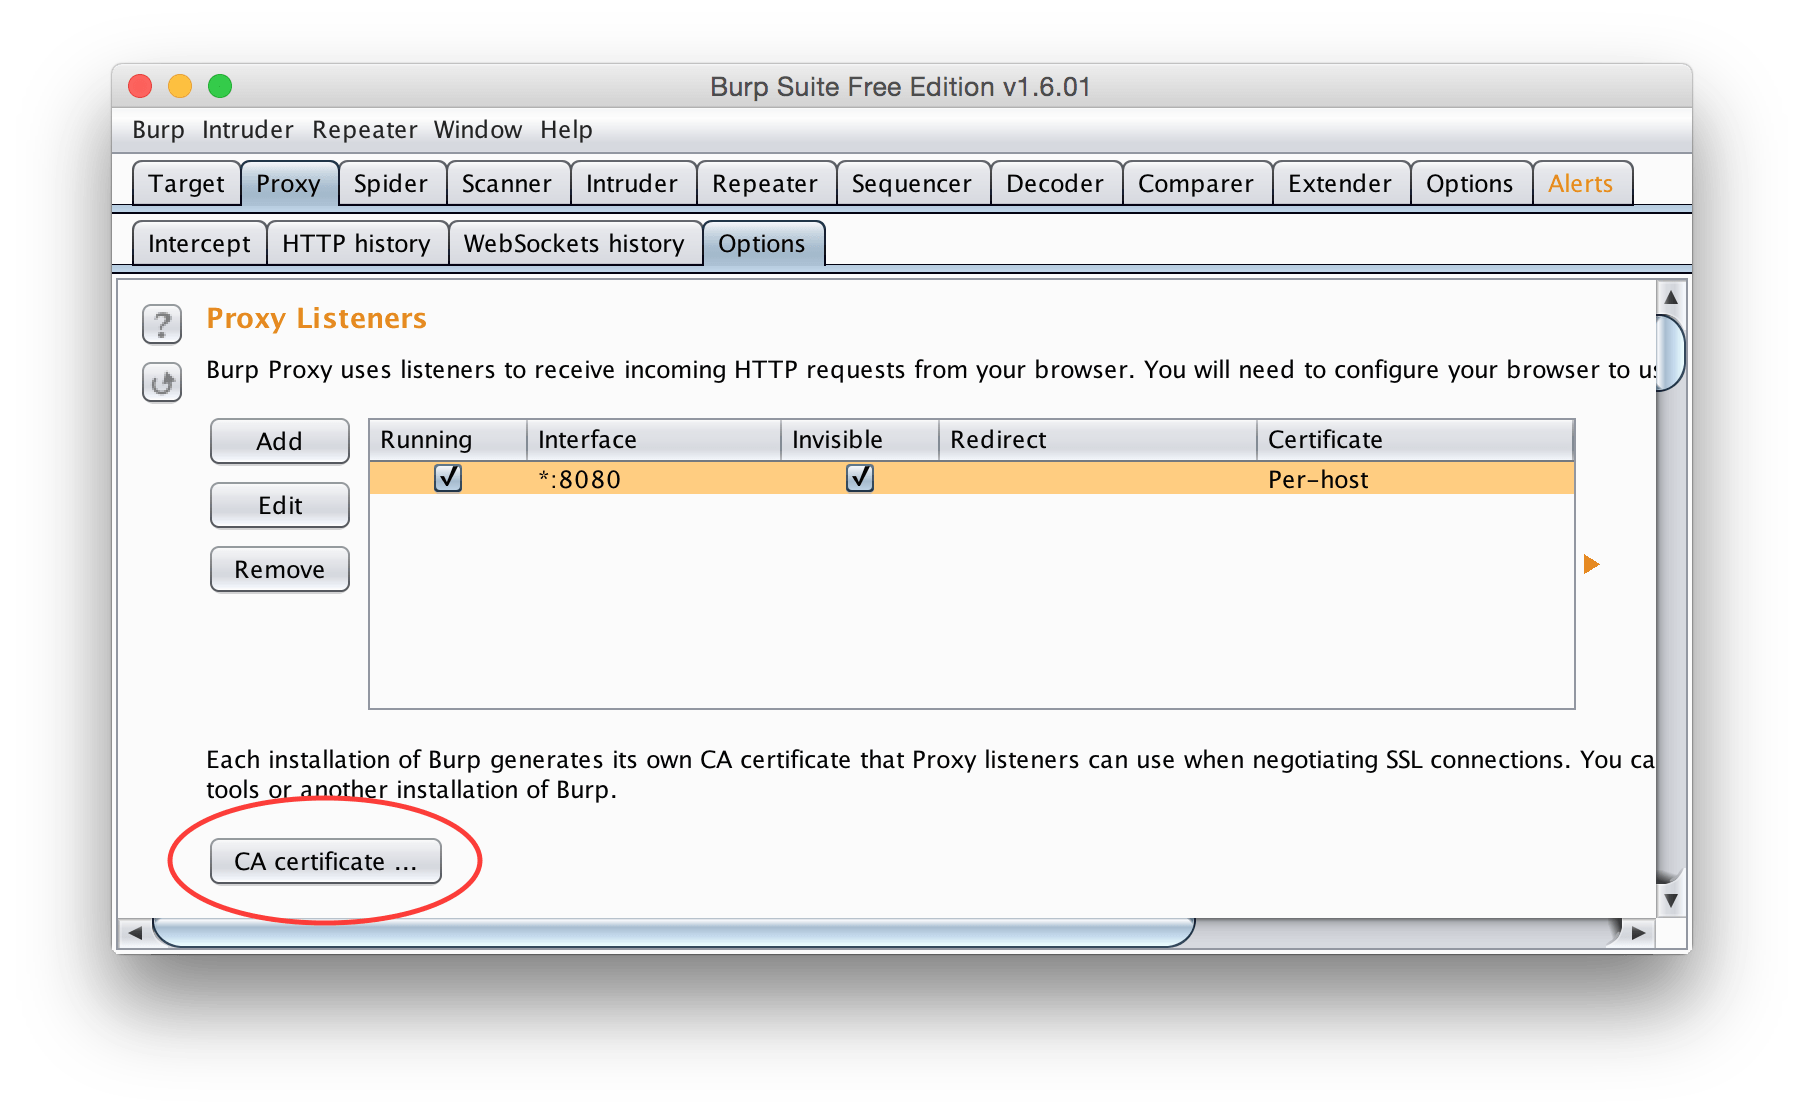
We need to export BurpSuite’s CA certificate to put on our iOS device so we can intercept and decrypt the traffic. The option for this is again in the Proxy tab, Options subtab. Below the Proxy Listeners, there is a button to export the CA certificate.
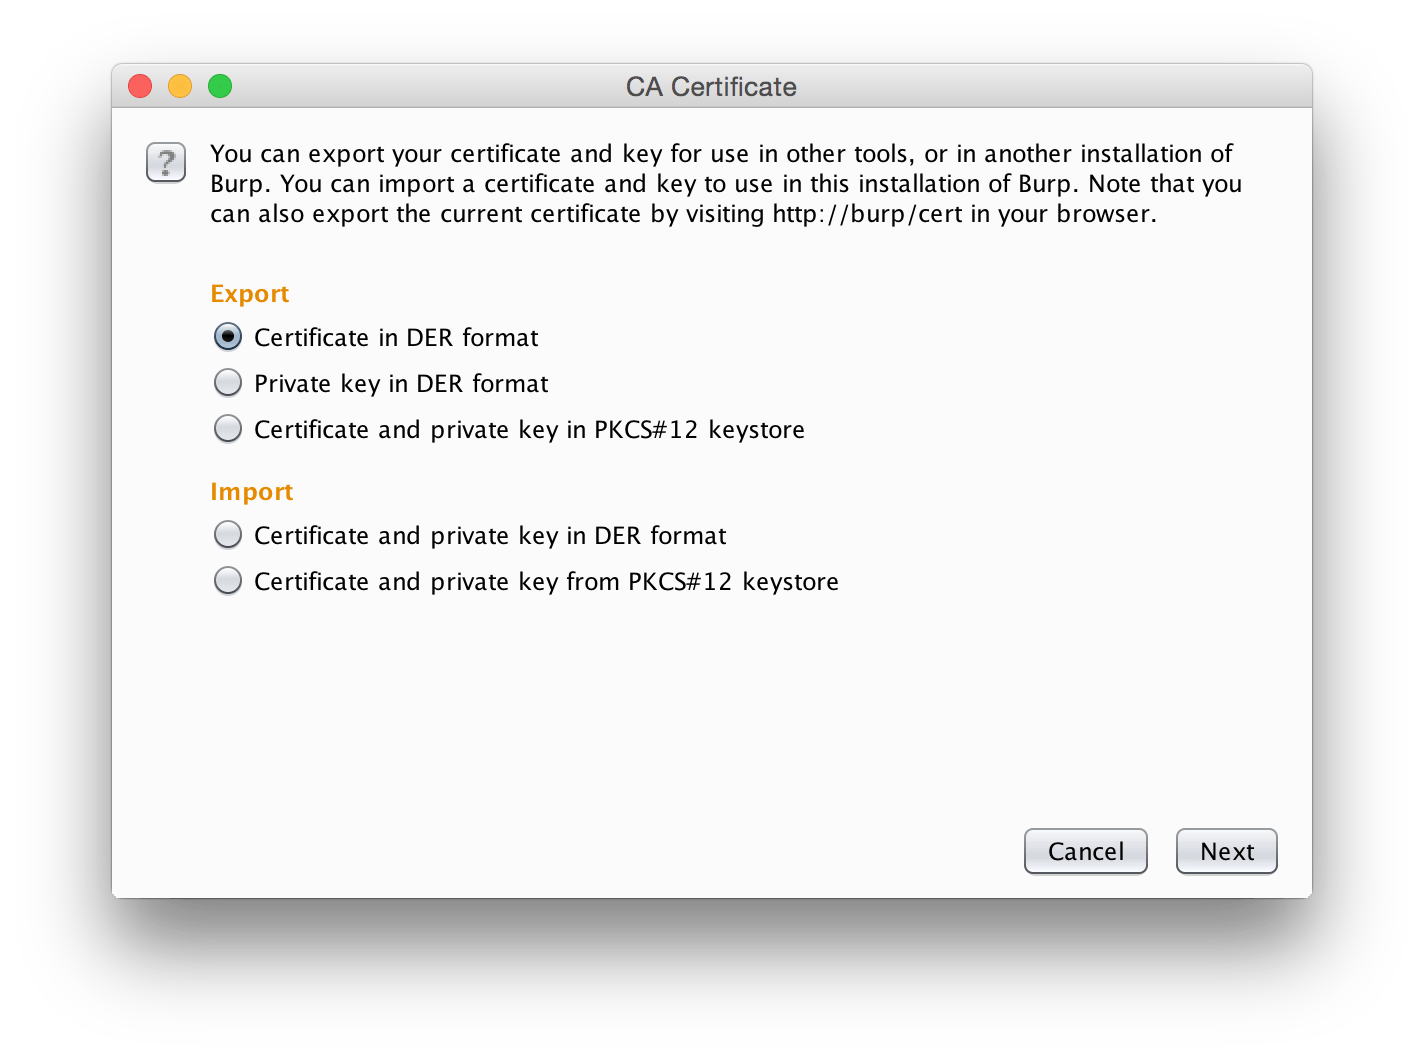
Clicking that will open a wizard to export the certificate. We will export it in DER format to someplace where we can find it later.
Now we need to get the certificate onto our device one way or another. You can probably email it to yourself, but my favorite way is to just have a web server running on my computer that I can then download it. In this case, the URL for it would be something like http://192.168.1.147/~caesar/BurpCA.der. This is beyond the scope of this tutorial, however, and I leave it as an exercise to the reader how they want to transfer the file.
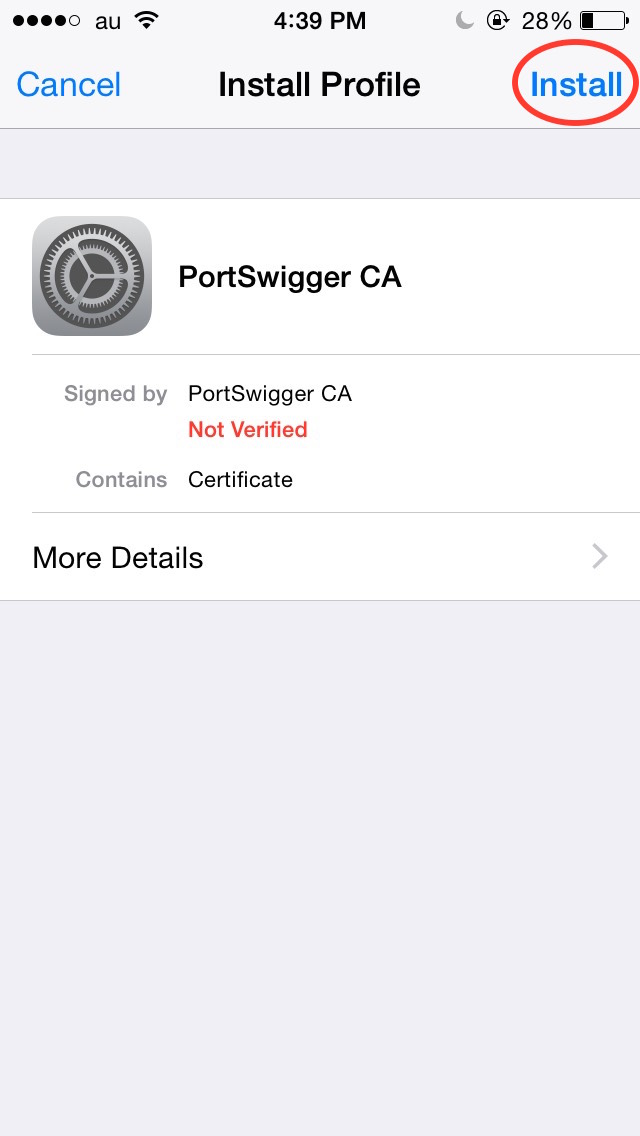
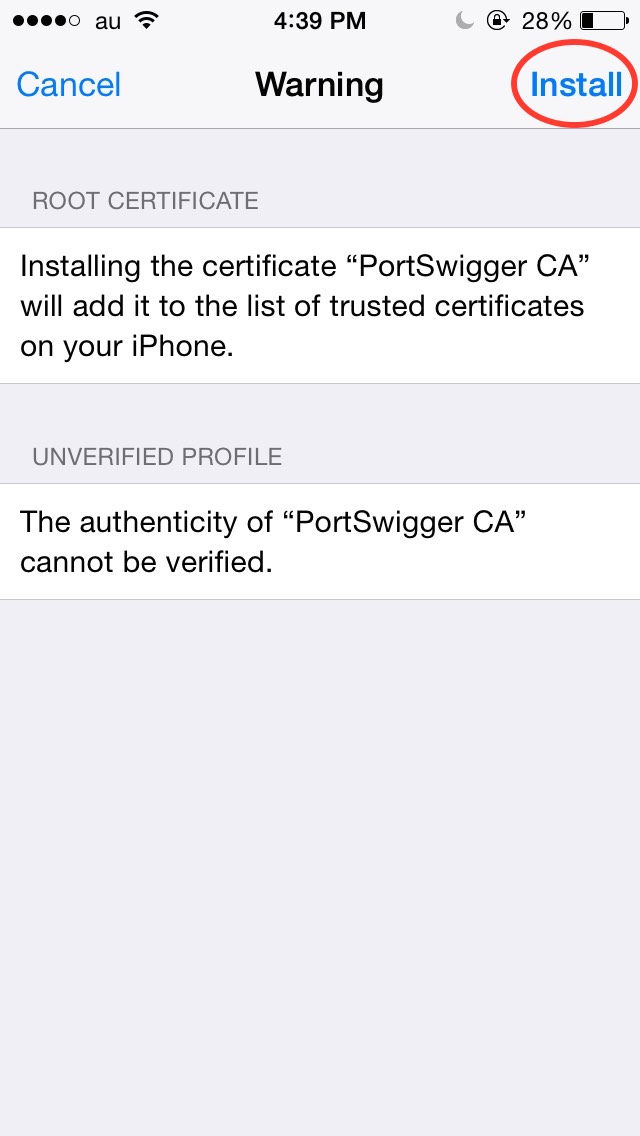
Once you have the file accessible from the iOS device, you can open it. You will be presented with this screens. Tap “Install” a few times to get the certificate installed.
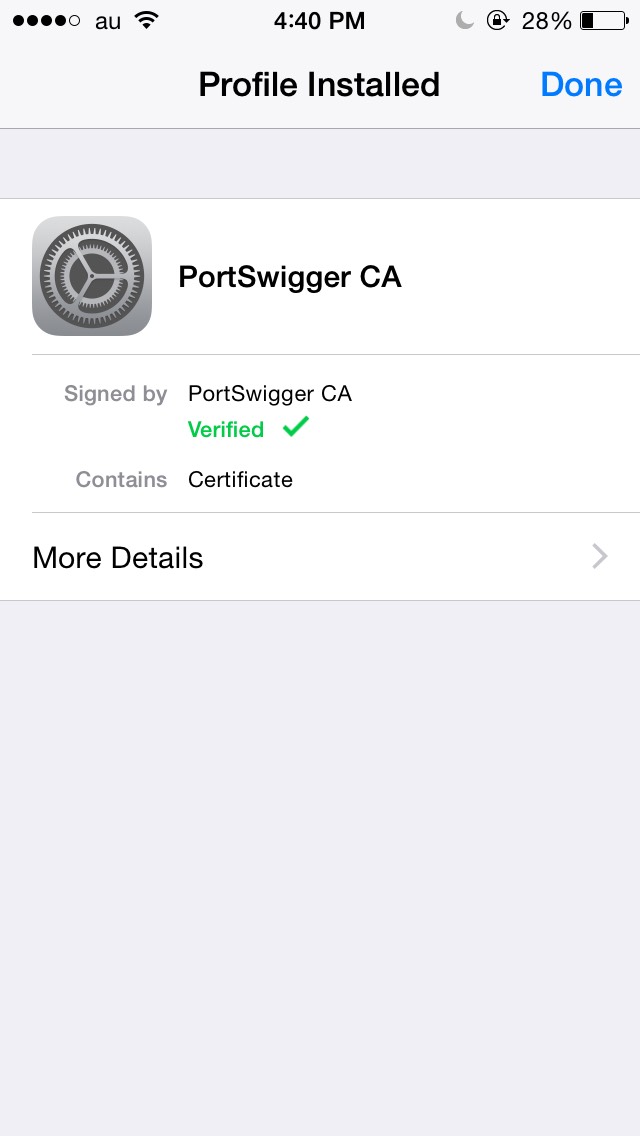
Congratulations, now you can decode your HTTPS traffic through BurpSuite!
Deleting the CA Certificate
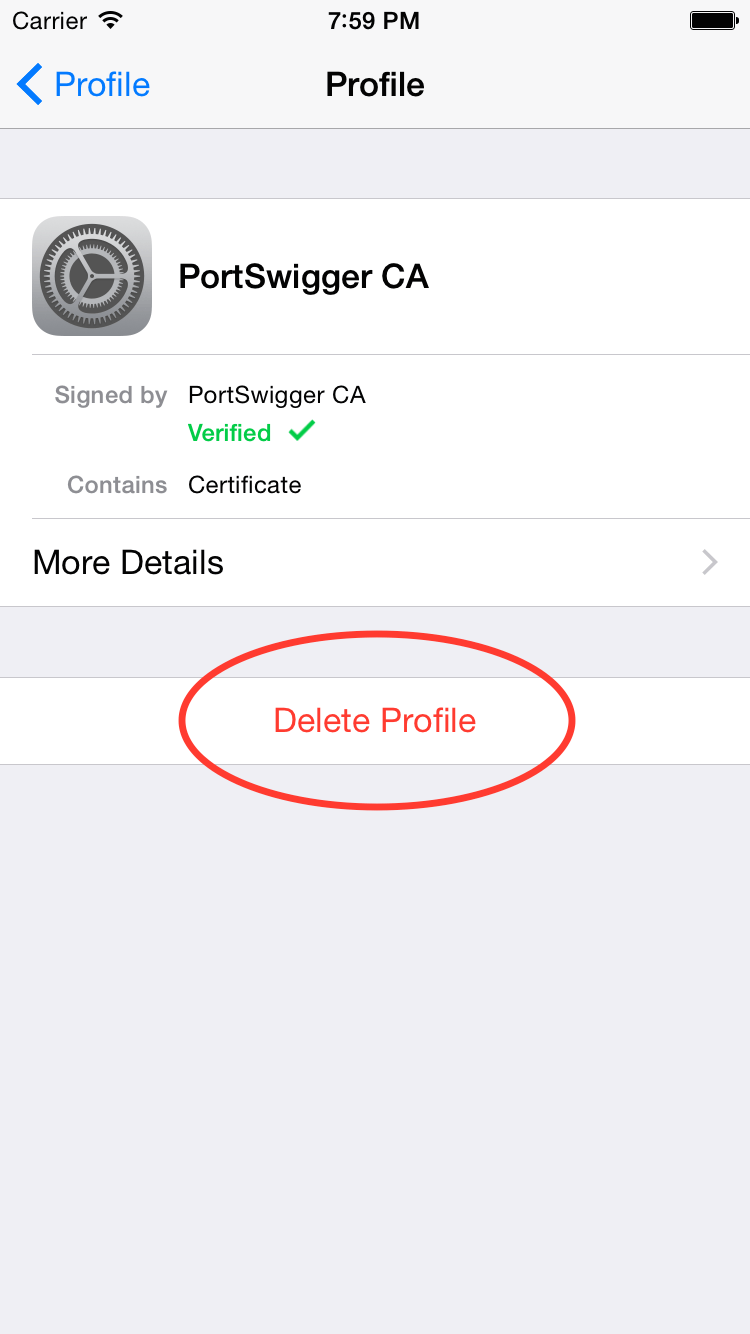
Leaving the certificate installed can leave you vulnerable to people who use the PortSwigger CA. They might be able to MITM attack you and read your data. Let’s make sure we know how to delete it.
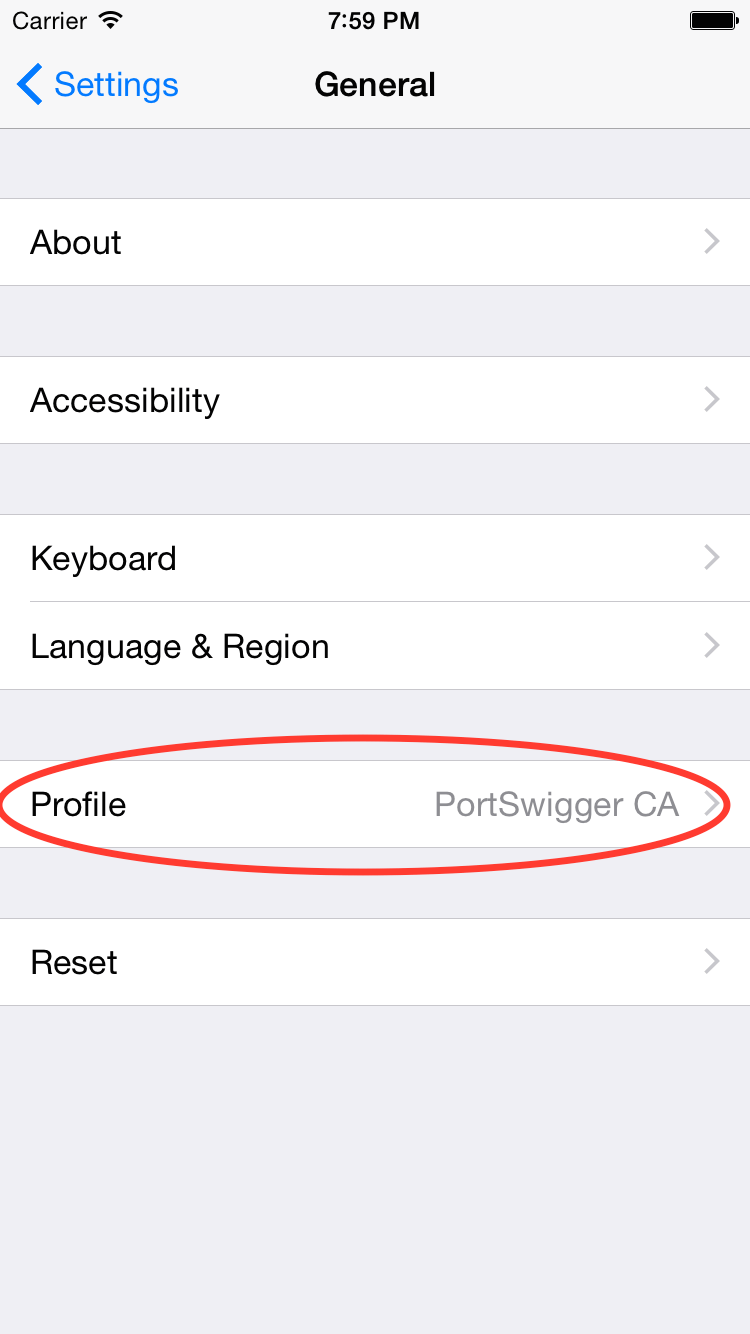
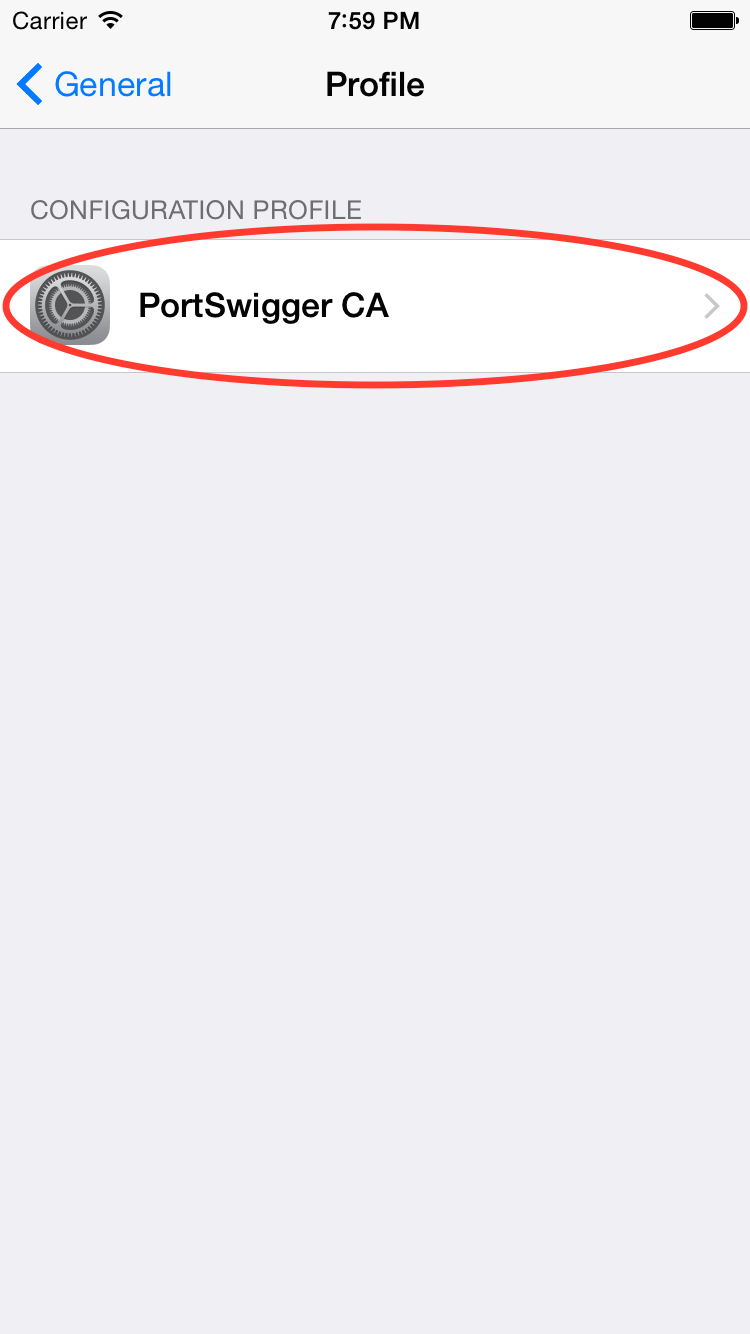
This is also in the Settings app on your iOS device. In the General settings, there should be a Profiles option. Following that setting, you should see a list of profiles installed (or only 1 if that’s all you have). Open up the one that is called PortSwigger CA and delete it.
Monitoring HTTP and HTTPS Traffic
Well, we’ve made it this far. The hard part is over. Hopefully you remembered to check the “Remember Settings” option. Now comes for the real fun – seeing our traffic!
Have your iOS device make some web traffic. It doesn’t matter what. Now take a look in the Proxy tab, HTTP history subtab of BurpSuite…
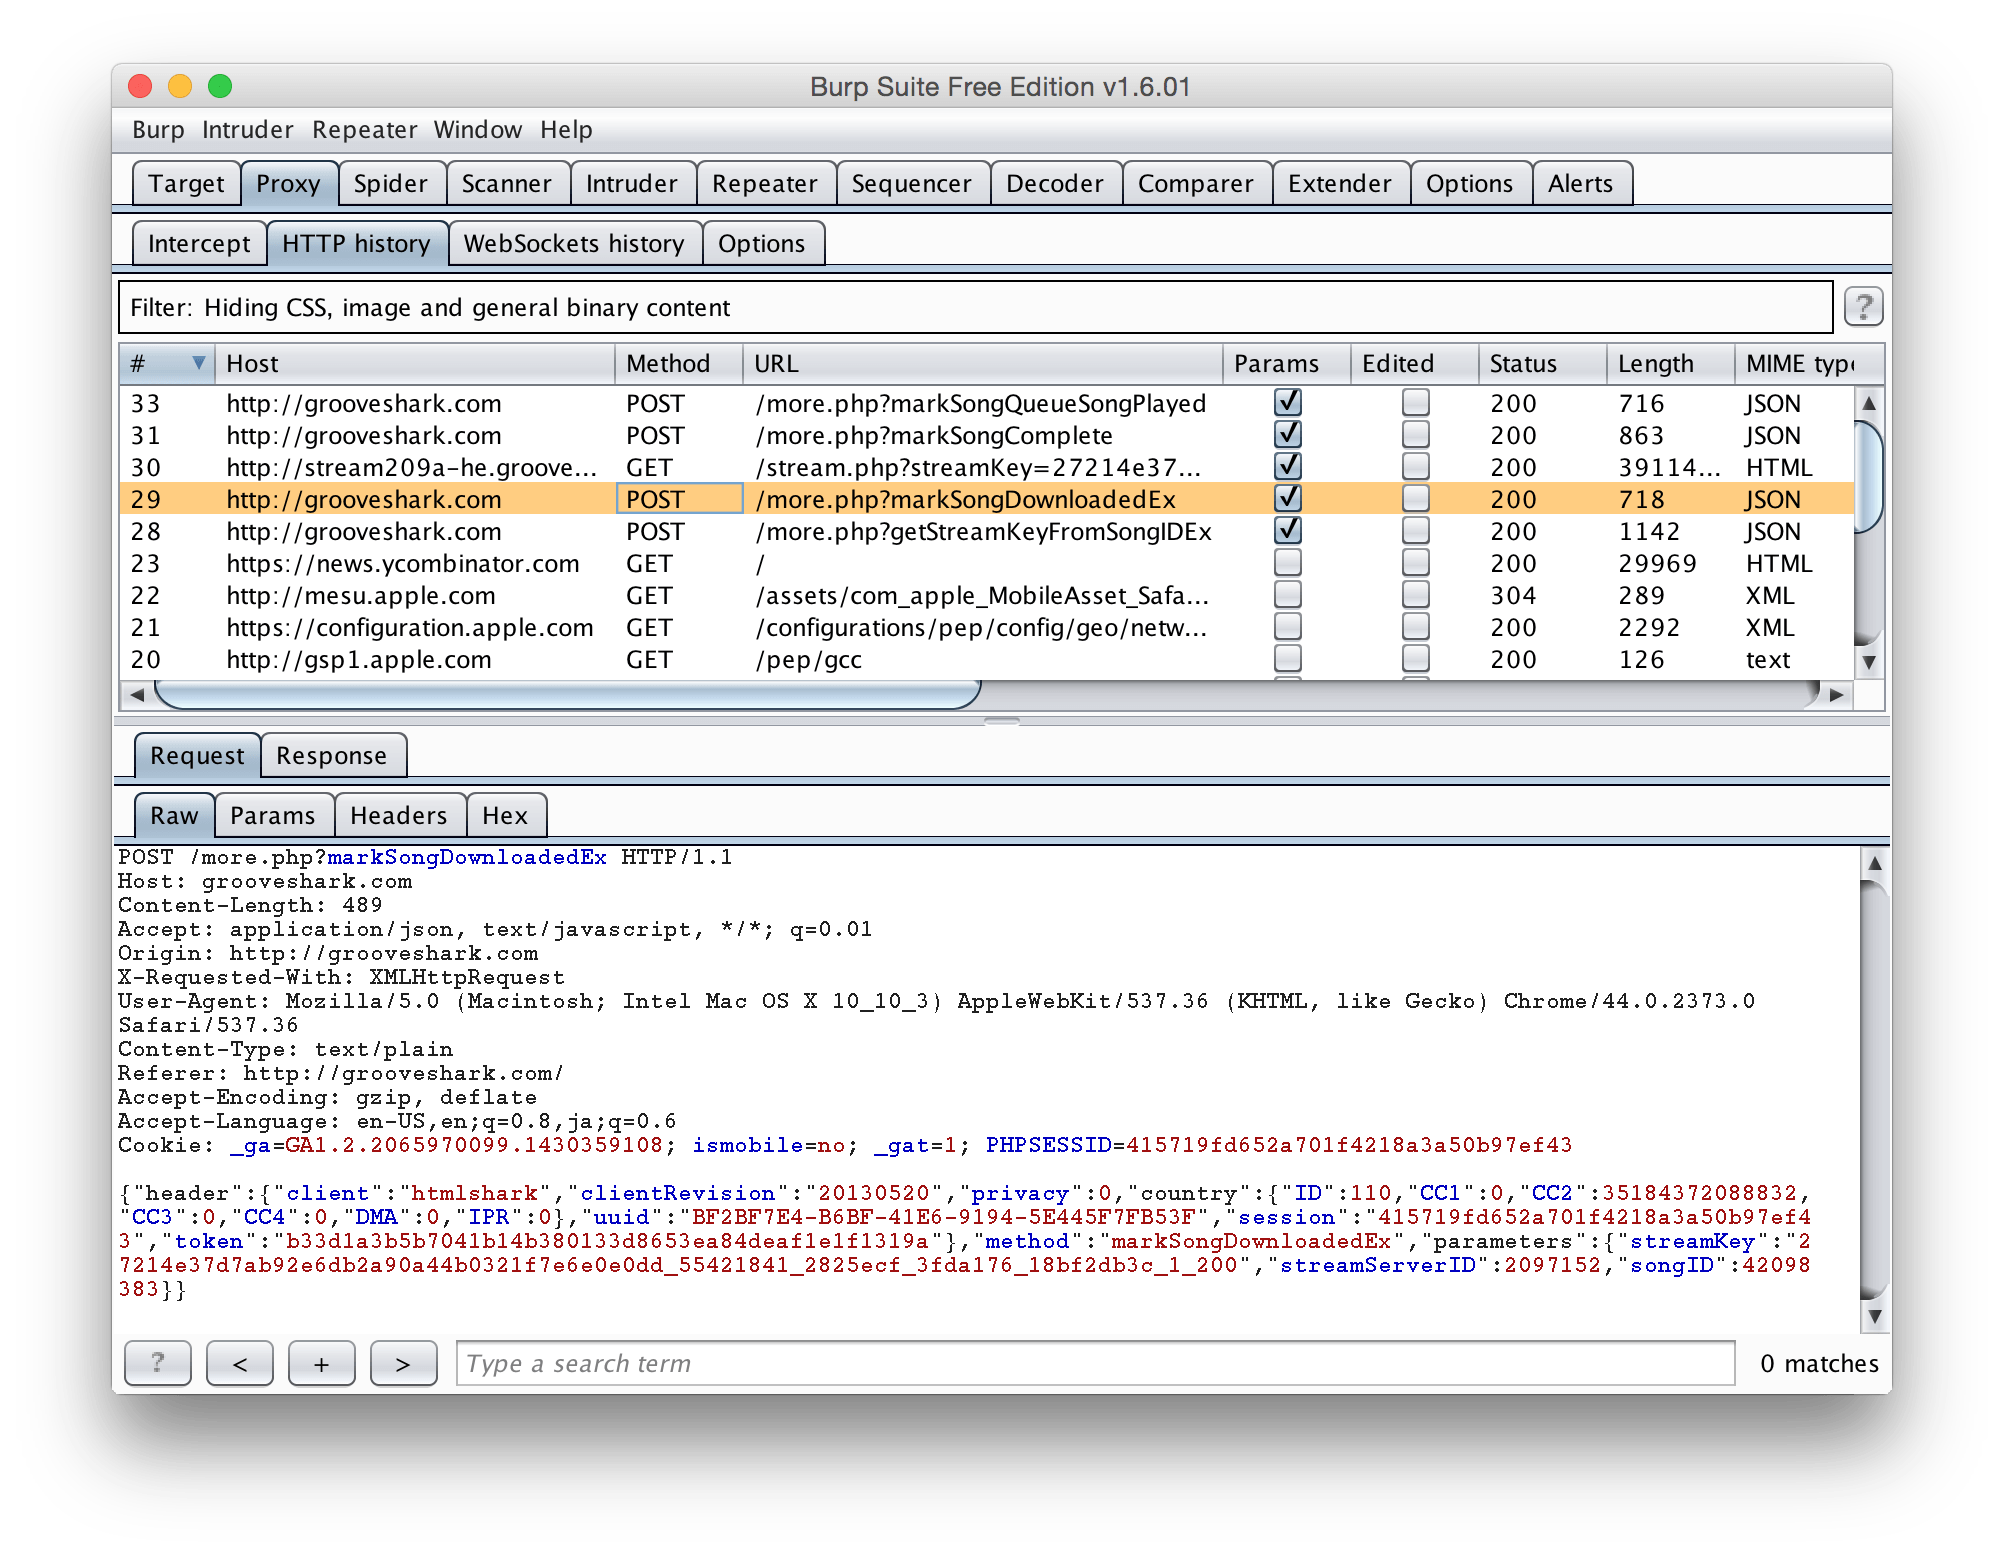
A transcript of all the HTTP and HTTPS traffic that you made! You can see the headers of the response and request, and the data that was sent along with it – great if you have a JSON based API you are talking to.
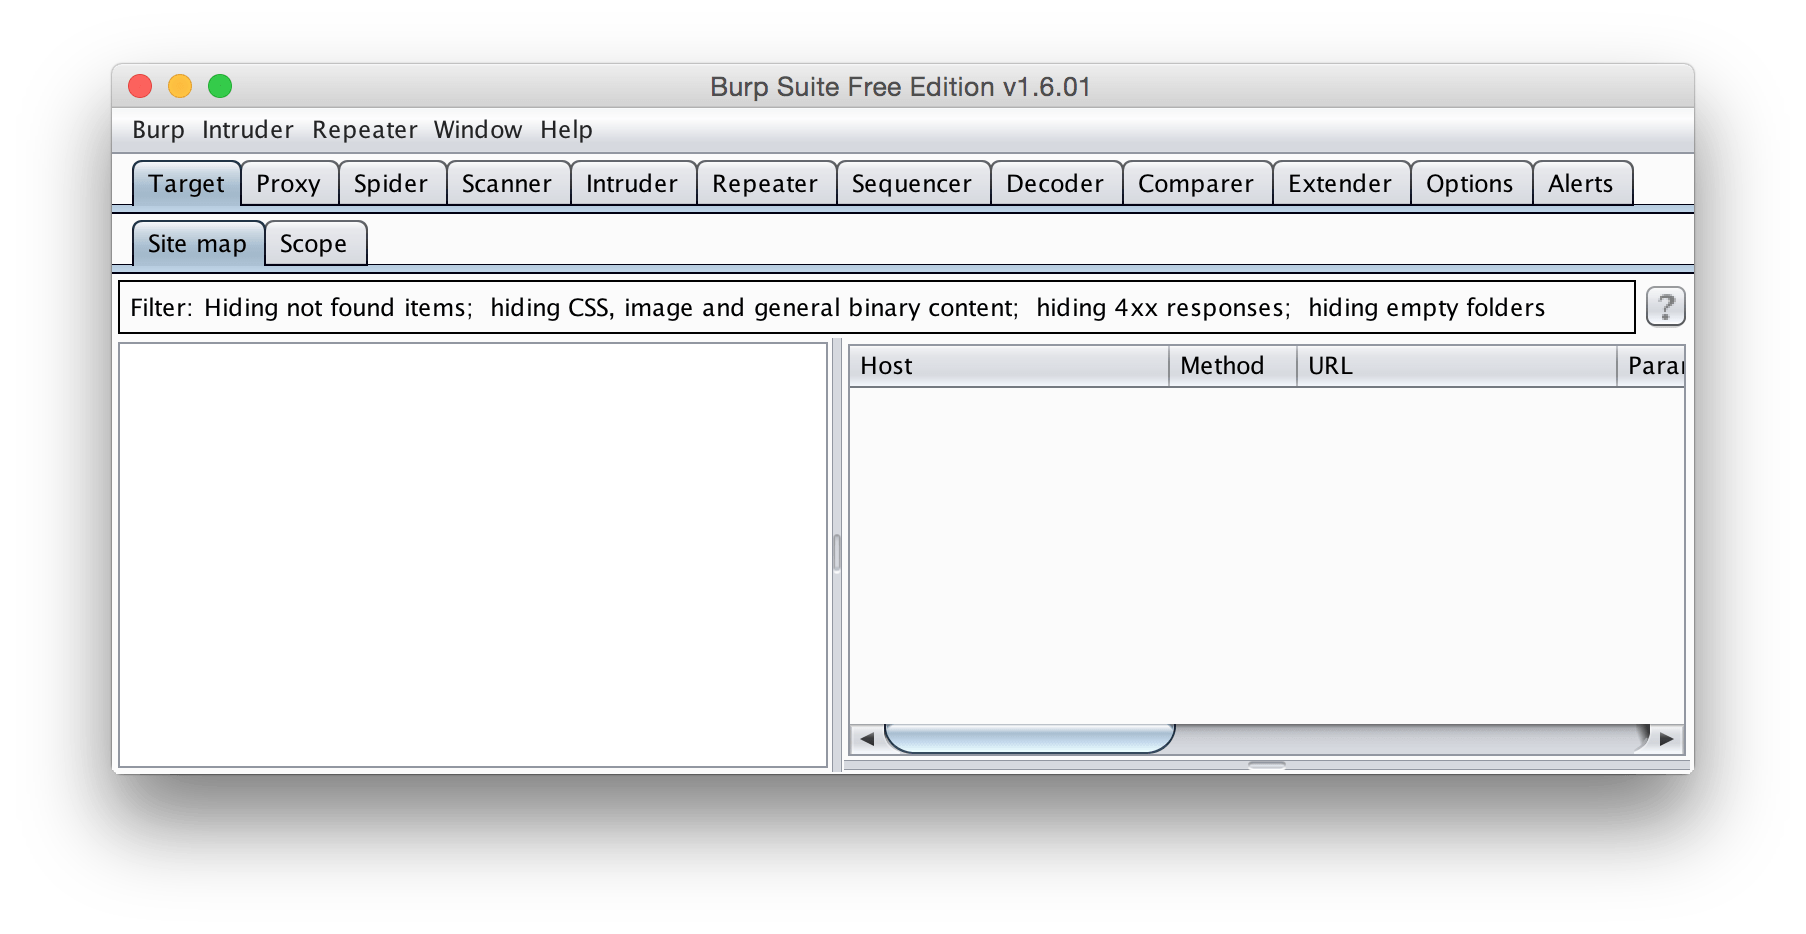
Back in the Target tab, Site Map subtab, we can also view the HTTP and HTTPS requests just made to a certain domain.

And thats it! That’s all it takes to set up your iOS device to debug it. It may have taken us a while to get here, but once you do it once or twice, it becomes second nature.
Play around a bit and see if you can figure out how to filter the Scope of the requests, or how to edit the request and response data. Maybe I’ll even cover some more of that in a future post!
Footnotes
This is certainly not the only way to debug your HTTP and HTTPS traffic on your iOS devices. If you just want to check the HTTP traffic, then I recommend HTTPScoop – it’s not free, but its super easy to use. Not bad for $15.
I have also heard good things about Charles, but I have never used it myself. Plus it’s a bit more pricey – $50 for a 1-4 person license.